
07 October, 2025
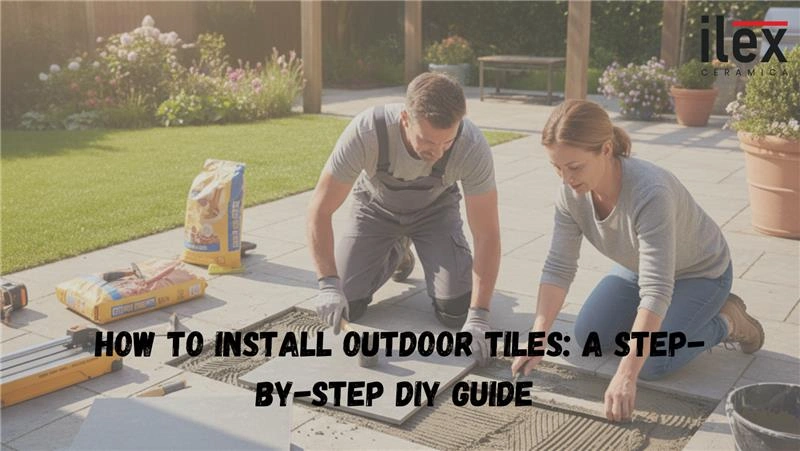
Introduction to Outdoor Tiles
Outdoor living spaces, patios, balconies, terraces, and kitchens, are now lifestyle zones that function as second living rooms.
Durable tile and stone surfaces create inviting areas that extend indoor style outdoors while resisting weather and wear. They can also hide slab flaws, refresh older decks, and boost resale appeal.
Successful projects consider more than just tiles: drainage, wiring, wall finishes, and furniture layout all play a role. Small steps like sealing joints or filling cracks help ensure a smooth, long-lasting installation.
Why Porcelain Tile is a Top Choice
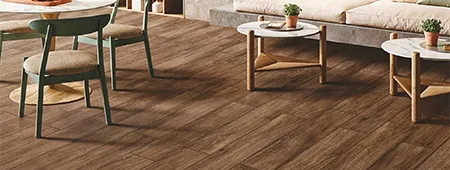
Porcelain tile is a top choice for patios, pool decks, and garden paths thanks to its strength, low absorption, and resistance to fading and freeze/thaw cycles. With designs ranging from wood-look to stone-look, it suits almost any style and even allows seamless indoor-outdoor flooring.
For lasting results, proper installation is just as important as the material. A level, well-drained base, correct techniques, and flexible sealants ensure stability and prevent cracking. Addressing pipes, conduits, and other groundwork first transforms a patio into a durable outdoor space built to last.
Key Reasons Homeowners Choose Outdoor Flooring
-
Extends indoor style seamlessly to outside areas
-
Creates a low-maintenance surface that handles heavy use
-
Adds long-term value to the property
-
Can improve slip-resistance and safety around pools
-
Offers wide design flexibility with multiple finishes
-
Ideal for high-traffic public spaces such as sidewalks, where durability and stability are essential
These kind of benefits become even more apparent when the installation is treated as a finished project. For example, a patio with high-quality porcelain tiles over a properly prepared concrete base and sealed joints will withstand heavy foot traffic, weather changes, and even the movement of outdoor furniture without developing cracks. This makes outdoor tile mandatory choice for homeowners seeking both style and longevity.
Pre-Installation Checklist
-
Assess slope and drainage check for at least 1/8” per foot of slope
-
Plan layout and measure square footage accurately
-
Lay out tiles in precise squares to ensure straight grout lines and a balanced design
-
Gather equipment and materials (trowels, spacers, mortar, sealants)
-
Order 10 % extra tile for cuts and breakage
-
Verify tile is outdoor-rated (look for manufacturer’s frost/UV rating)
Choosing the Right Tile for Patio & Outdoor Kitchens
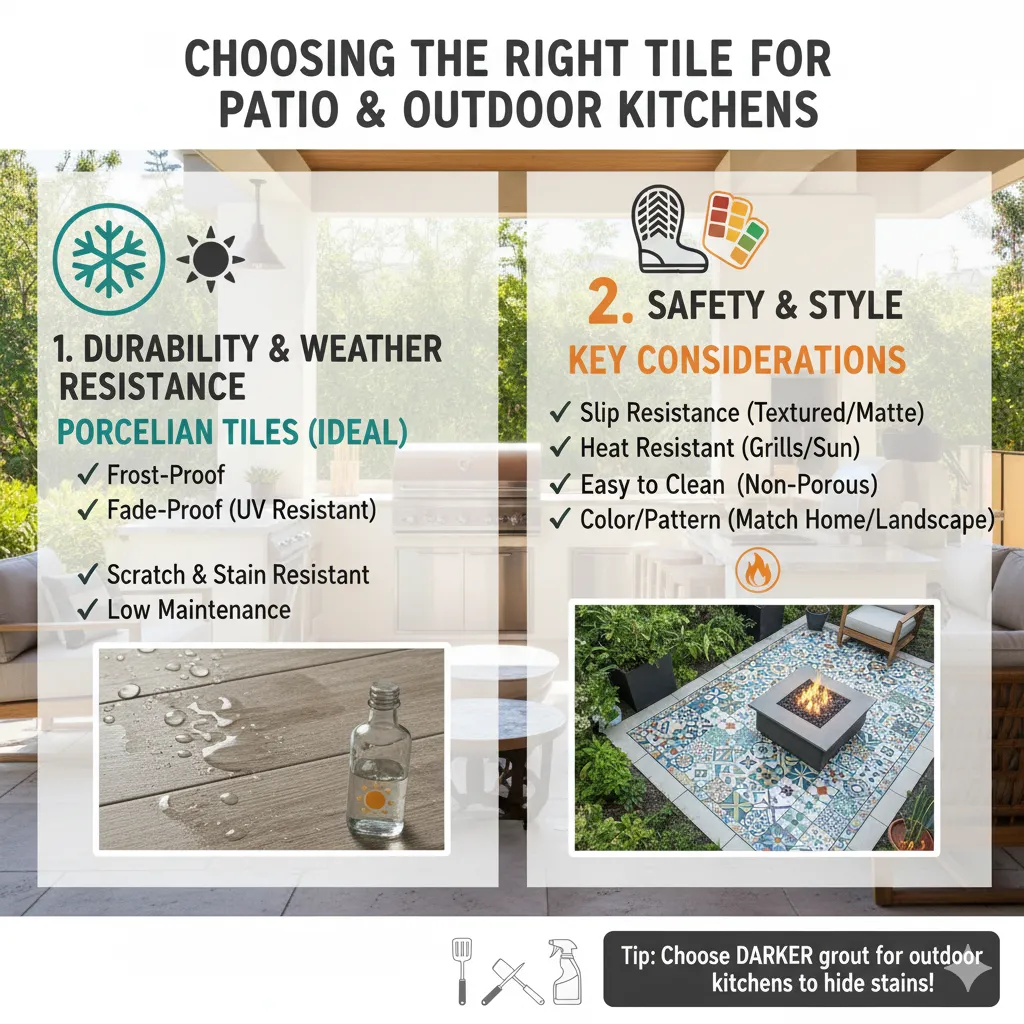
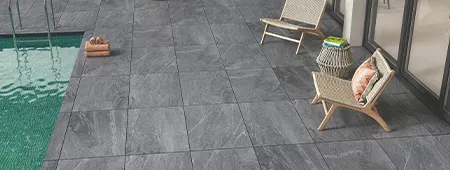
When selecting outdoor patio, look beyond durability. Color, texture and pattern dramatically affect the ambiance of a patio or outdoor kitchen, enhancing the overall atmosphere. Earth-toned porcelain tiles blend seamlessly with gardens, while light neutral tones make small balconies feel larger and airier. Textured or slip-resistant finishes also add safety near swimming areas or entryways. Experts suggest consulting a professional or following best practices when selecting outdoor tiles to make certain the best results for your space.
Not every tile marketed as “outdoor” is built for extreme conditions. Always check for tiles specifically rated for exterior applications. Outdoor-rated tiles are engineered to withstand moisture, UV rays and temperature swings, making them ideal for pools, patios, outdoor kitchens, and even vertical applications like feature walls or outdoor fireplaces.
Also think about how the patio will meet existing walls, posts, or built-in seating. Will you need to cut around pipes, planters, or electric wires? Will you paint adjacent walls for a complete refresh? Taking these factors into account helps you design an ease of installation that feels intentional rather than pieced together and makes the finished patio look like a professional outdoor living space.
Extra Tip: If your outdoor area receives full sun all day, consider slightly lighter colors to reduce heat absorption. For shady or tree-lined spaces, darker tiles may be better at hiding dirt or fallen leaves.
Ilex Ceramica Outdoor Tiles
If you’re looking for premium outdoor tiles, Ilex Ceramica stands out as a leading manufacturer and exporter. The company offers a wide portfolio of exterior-rated porcelain tiles and 20 mm thick pavers, specifically engineered for patios, terraces, swimming area, and garden pathways. Their outdoor range includes an R11 matt finish for high slip-resistance and a natural look, making it one of the safest and most stylish options for high-traffic or wet areas. The extra-thick 20 mm concrete pavers are designed to be laid on grass, gravel, sand, or raised pedestals, giving homeowners and designers maximum flexibility while ensuring durability, easy maintenance, and long-term performance outdoors.
Common Outdoor Tile Options
| Material | Water Absorption | Slip Resistance | Maintenance |
|---|---|---|---|
| Porcelain Tile | <0.5 % (Excellent) | High with textured finish | Low |
| Natural Stone (Slate, Granite) | Moderate | Varies | Moderate–High (sealing needed) |
| Concrete Pavers | Low–Moderate | Moderate | Moderate |
| Quarry Tile | Low | Moderate | Low |
Design Tips for Outdoor Tiles
-
Light neutrals make small balconies feel larger and airier
-
Dark, earthy tones hide dirt and complement gardens
-
Textured finishes add grip near swimming area or entryways
-
Wood-look porcelain can warm up modern spaces without the maintenance of real wood
-
Mix large-format tiles with accent mosaics for borders or inlays
When designing your layout, think of it as a complete process rather than just installing tile. This may include painting nearby walls, updating lighting or electric outlets, or adding built-in planters. Coordinating these elements during the same project can save time and make certain the patio feels cohesive and professionally executed.
For this guidance on designing and laying out outdoor tiles, you can refer to a guide for detailed instructions and helpful visuals.
Designing the Tile Pattern
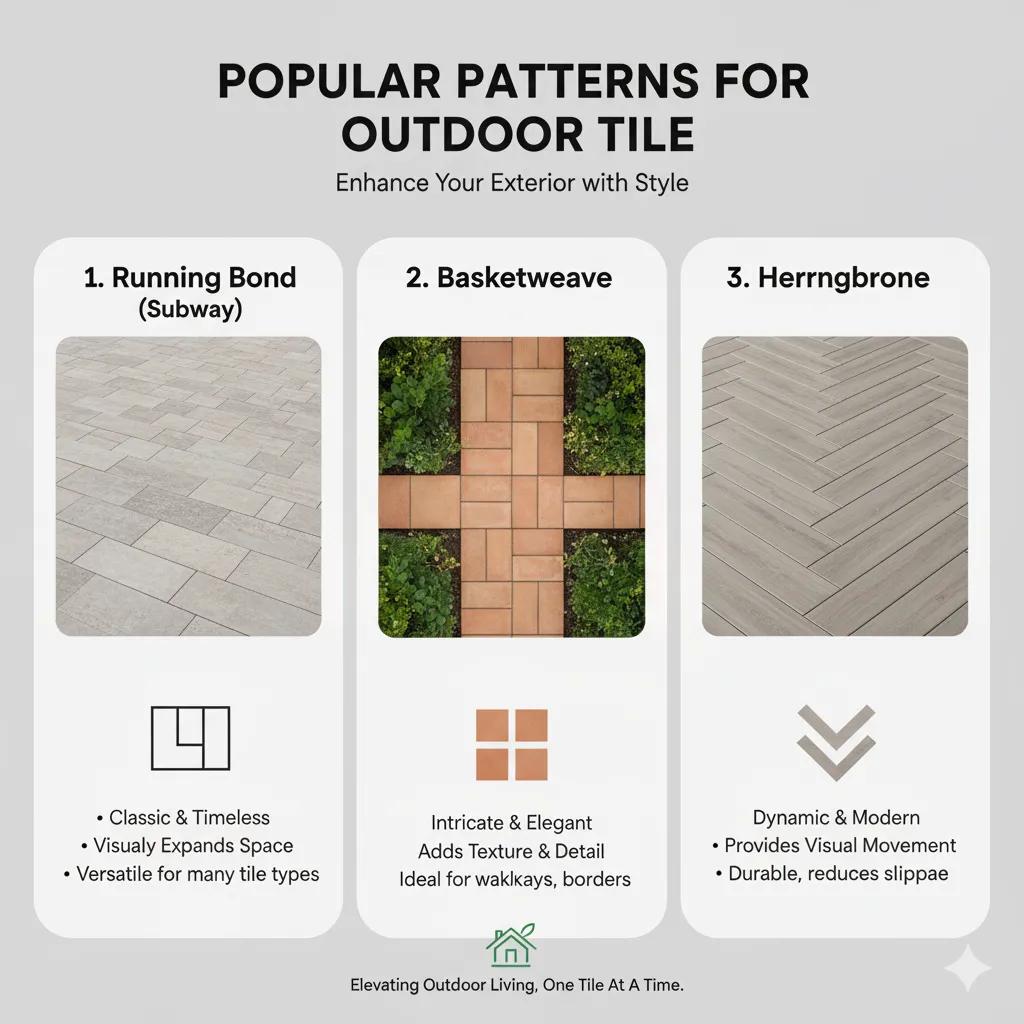
The layout of the tile pattern can completely change the perception of your outdoor space. Straight-laid tiles create a clean, modern feel, while diagonal or herringbone pattern introduce movement and visual interest.
Large open patios often look best with large-format tiles installed in a grid or offset pattern. Narrow pathways or small balconies may benefit from smaller tiles or mosaics that minimize cuts and waste.
Popular Patterns for Outdoor Tile
-
Straight lay (clean, modern)
-
Running bond/brick (classic and forgiving)
-
Diagonal (visually enlarges the space)
-
Herringbone (adds movement and elegance)
-
Modular/Versailles (mixes tile sizes for a rustic or European look)
Quick Visualization Checklist
-
Draw pattern on graph paper or use a digital room visualizer
-
Dry-lay a few rows before committing
-
Align cuts with edges or borders for symmetry
-
Consider expansion joints within large areas
Preparing the Surface
Proper surface preparation is one of the most critical steps. A clean, stable, and level base ensures a strong bond between tile and substrate and reduces the risk of future cracking or loosening.
Clear debris, grease, and old adhesive, then patch cracks or low spots. Use the right tools, a stiff brush, notched trowel, and level, for an easier, more accuratcy and ease of installation.
Where possible, install tile over a solid concrete base rather than loose soil. For balconies or rooftop terraces, use waterproof membranes to protect the underlying structure from moisture infiltration.
Check the substrate for hidden pipes or conduits and protect or reroute them before pouring concrete or applying membranes. Keeping access available allows future repairs without disruption. Handling these details early prevents costly changes and makes installation easier and more predictable.
Note: In freeze-prone areas, consider a drainage mat under the tile system to prevent water buildup under the surface.
Installing the Tile
Start by marking a center reference line. Spread thin-set mortar with a notched trowel, then press tiles in with a slight twist for full contact on a clean, dry surface..
Check alignment often with a level and use spacers for uniform grout lines, allowing for expansion and contraction. This makes it easier to achieve professional-looking results, even for beginners.
Leave movement joints around edges, posts, or planters, and ensure proper slope so water drains away.
Though outdoor tile installation can be challenging, with preparation and a systematic approach working in sections, dry-laying complex patterns, and consulting guides, most homeowners can manage it. For larger or complex projects, consider hiring a professional.
Grouting the Tile
Grout locks tiles in place, fills gaps, and keeps out dirt and moisture. Choose a polymer-modified or outdoor-rated grout that withstands water and temperature extremes - the ideal option for exterior use.. Apply diagonally with a rubber float, press firmly, and wipe excess with a damp sponge.
After curing, seal the grout to resist stains, mildew, and UV damage, making it easier to clean and longer-lasting. Inspect joints for cracks or voids, touch up if needed, and reseal for full protection, especially important in freeze/thaw climates.
Tip: For large-format tiles outdoors, consider using a grout color that complements for a more seamless look.
Handling Gaps and Joints using a Caulk Gun for Perfect Seals
Fill perimeter gaps and joints with flexible, weather-resistant sealant to allow movement and block water. Apply with a caulk gun, then smooth with a damp finger or tool. Inspect regularly and reapply if cracks appear, well-sealed joints extend the life of the installation.
Safety Precautions
Always suggest wearing safety glasses, gloves, and a dust mask when cutting or mixing materials. Porcelain can produce sharp edges and silica dust during cutting.
Be familiar with all safety equipment and instructions so you can use them effectively in the moment of an emergency.
Keep the work area clear of tripping hazards like loose tools, extension cords, or obstacles in your patio area. Ensure good ventilation if working with adhesives or sealants indoors or in covered spaces.
Use ladders or step stools safely, maintaining three points of contact. Lift heavy tile boxes, concrete bags, or mortar with proper form or ask for assistance to avoid injury.
Follow the manufacturer’s instructions for tile saws, drills, grinders, and other installation tools. Disconnect power before changing blades or bits. A cautious approach prevents accidents, damaged materials, or cracks in tiles and grout.
Troubleshooting Common Issues
Even with careful planning and execution, installing outdoor tiles or pavers can present a few challenges along the way. One of the key factors to monitor is proper drainage. If water is allowed to pool on the surface or beneath the tiles, it can compromise the integrity of your outdoor living area, leading to cracks, loose tiles, or damaged substrate. Always ensure your patio, walkway, or pool area has a gentle slope to direct flow away from the house and toward designated drainage points.
If you notice water not draining as it should, check for low spots, blocked drainage channels, or gaps and address them promptly. Regular maintenance is key, inspect your pavers, grout, and joints for any signs of wear, cracks, or deterioration.
Cracks in tiles, grout, or mortar can also occur if the substrate wasn’t properly prepared or if the wrong type of cohesive agent was used during installation. If you spot any cracks, act quickly to repair them to prevent further water infiltration and damage. For persistent issues, such as recurring cracks, uneven surfaces, or misaligned patterns, it may be helpful to consult a professional installer or refer to trusted online tutorials, references, or guides.
By staying proactive with maintenance and addressing small issues as soon as they arise, you’ll help ensure your outdoor tile project remains beautiful, functional, and durable for years to come.
Tips for a Successful Installation
Best way to achieving a flawless outdoor tile installation starts with a few tips that every homeowner should keep in mind for a smooth and even fun DIY experience. First, select tiles specifically designed for outdoor spaces, porcelain tiles are an ideal choice thanks to their durability, low maintenance, and resistance to water and temperature changes. Before you begin, make sure your substrate is clean, dry, and level, and that your drainage system is set up to allow to flow away from your outdoor space or patio.
Gather all the necessary tools, including a level, trowel, caulk gun, and measuring squares, to ensure each step of the installation process is smooth and precise. Pay close attention to the layout plan your tile pattern in advance, considering the shape and size of your space, placement of pipes, electrical lines, and any spaces that need to be accommodated. Following the manufacturer’s ready instruction guide for both the tiles and adhesives is essential for a long-lasting installation.
During the installation, check your work frequently to ensure tiles are aligned and joints are even. Use caulk to seal gaps and joints, especially around edges and where tiles meet other walls or surfaces, to prevent water from penetrating beneath the tiles. After installation, keep the area clean and perform regular maintenance to catch any issues early.
If you’re new to tiling or tackling a difficult project, don’t hesitate to consult online resources, guides, blogs, or forums for helpful advice from experienced homeowners and professionals. By following these guidelines and paying attention to every detail, you’ll create an outdoor patio, poolside, or pathway that’s not only beautiful but also built to last.
Maintaining Your Outdoor Tile
Sweep and rinse regularly to remove debris, dirt, or sand and prevent staining. Mild soap and water usually suffice; avoid harsh chemicals that can damage grout, binding material, or tile finishes.
Inspect for cracks, loose tiles, deteriorating grout, or voids at least once a season. Prompt repairs keep small issues from becoming major problems.
In climates with freezing winters, ensure water drains off surfaces to avoid freeze damage. Cover or move heavy furniture during storms to prevent chips or scratches.
To maximize the longevity and appeal of your outdoor tiles or patio surfaces, continue with regular maintenance, and consider ongoing enhancements or improvements as needed.
Outdoor Tile Maintenance Snapshot
| Task | Frequency | Why It Matters |
|---|---|---|
| Sweep & rinse | Weekly | Prevents dirt build-up |
| Inspect grout & joints | Seasonally | Early detection of damage |
| Re-seal grout/sealant | Every 1–2 years | Extends lifespan |
| Check drainage slope | After major storms | Prevents water pooling |
Conclusion
Installing outdoor pavers is a rewarding DIY project that can transform a plain patio or balcony into a stylish, functional space. With outdoor-rated porcelain tile, a solid base, and proper steps from mortar to sealing, you’ll achieve a finish that endures weather, traffic, and time.
Remember one thing to prioritize drainage and movement joints, both essential for long-term performance. Use safety gear and take your time; patience and preparation pay off.
With the right guidance, tools, and attention to detail, you’ll create an outdoor environment that not only elevates your home’s aesthetic but also adds lasting value. Get ready to start your own outdoor tile installation project and enjoy the transformation.
Frequently Asked Questions
Q1: What type of tile is best for outdoor living spaces and patios?
Porcelain tiles with low water absorption and slip-resistant finishes are widely regarded as the most durable and versatile choice for patios, pool decks, and terraces. In the world of outdoor tile products, you'll find a wide range of styles, textures, and finishes to suit any design preference.
Q2: Can I install outdoor tiles directly over concrete?
Yes, provided the concrete is sound, level, and free of cracks. Fill any cracks first and ensure proper drainage slope before installing the tile.
Q3: How thick should outdoor pavers be for a patio?
Many experts recommend 20 mm (about ¾-inch) porcelain pavers, like those from Ilex Ceramica, for patios and high-traffic outdoor areas.
Q4: Do I need movement joints in an outdoor tile installation?
Absolutely. Expansion joints are essential to accommodate temperature changes and prevent tiles from cracking or lifting. When hiring a contractor for your project, it's a good idea to ask friends or neighbors for recommendations to ensure you find someone reputable.
Q5: How do I maintain outdoor tiles after installation?
Sweep regularly, rinse with mild soap and water, inspect grout and joints seasonally, and reseal as needed to keep the surface looking fresh.